Deploying a Drupal site to AWS using Terraform
Submitted by Christian Crawford
on Thu, 06/22/2023 - 21:02
### Outline
1. [Introduction](#introduction)
2. [Infrastructure outline](#infra-outline)
3. [Terraform concepts](#terraform-concepts)
4. [Code overview](#code-overview)
5. [Applying the code](#applying-code)
## Introduction
I've been working with Drupal since 2015 so I've got a pretty good grasp on it and I feel I can confidently advise a client on how best to utilize it. AWS is another very common part of many client projects and I have a rough idea of the services that they offer, but there is an enormous number of them and it's hard to become intimately familiar with them all unless you're working with them on a regular basis. In order to get a deeper understanding of AWS and Terraform I decided to create a project that involves all three.
In [my previous article](https://spinspire.com/article/introduction-to-terraform) I explained the basics of what Terraform is, why you should use it, and a few simple code examples. This article will continue to discuss Terraform, going into more advanced topics. By the end of this article you should have a fully working Drupal site with all the necessary infrastructure to host, serve, and maintain it (in AWS).
## Infrastructure outline
In order host and run our site we'll be using the following services:
1. ECS (Elastic Container Service)
2. RDS (Relational Database Service)
3. EFS (Elastic File System)
4. ALB (Application Load Balancer)
5. VPC (Virtual Private Cloud)
## Terraform concepts
### Modules
For small projects it's common to have all your terraform configuration in a single (main.tf) file. However when you start building more complex projects you'll want to break your code up into [modules](https://developer.hashicorp.com/terraform/language/modules). Modules are self-contained pieces of code which provide many benefits including:
* Logically grouping and scoping code
* Abstracting away complexity from the user
* Cutting down on any repetition of code allowing you to follow the [D.R.Y.](https://en.wikipedia.org/wiki/Don%27t_repeat_yourself) principle
Modules can be shared locally in your own projects and they can be published to public and private registries so others can use them. In this project I've broken up the code into 5 modules, each one a piece of the infrastructure that's been outlined above.
### Inputs and Outputs
Tied to modules are input and outputs. In my previous article I mentioned the `varaibles.tf` file, these define the "inputs" of your module. They can be either required or optional depending on whether or not you provide a default value. Similarly Terraform has the concept of "outputs" which allows you to export data from a module so it can be used in another one. These output values are defined in an `outputs.tf` file. One example would be the subnets in your VPC. Those are going to be used by other pieces of your infrastructure (load balancer, RDS, etc) so you would include them as an output. You will see many other examples of variables and outputs in my code.
### Resources and Data blocks
Resource blocks are the most fundamental part of the Terraform language. They tell the system what infrastructure should be created and how it should be configured.
Data blocks allow you to find and use pre-existing pieces of infrastructure that Terraform isn't aware of. A data block includes query filters to select the exact item that you're looking for.
For example you might have preferred an ami that you use for your EC2 instances or maybe you already have an existing VPC that you use for all your projects. The query can return a single resource (eg: ECR repository) or a collection of resources (eg: EC2 instances tagged with a certain tag) depending on how it was written and/or what filters you provided.
### Iterating
Terraform provides two ways to create multiple instances of a single resource type though the "meta-aguments" `count` and `for_each`. Count accepts a numerical value and allows you to use its value via the `index` property of the count variable (count.index). If a value of 0 is given no instance will be created.
The For_each argument works by iterating over a list or map. Similar to count, for_each provides a local variable, this time called `each`. This variable has a `key` and `value` property. **Although both can be used in a project, you're not allowed to mix them within a single module, you must use the same approach throughout.**
## Code overview
### Networking
The foundation of our project is the VPC, all of the other modules will rely on this module. The module sets up the VPC itself, the subnets, routing tables, and gateways.
The full code for this portion can be found [here](https://github.com/Tcraw77813/drupal-fargate/tree/main/modules/vpc). #### **Virtual Private Cloud** The [VPC](https://registry.terraform.io/providers/hashicorp/aws/latest/docs/resources/vpc) module has a dozen possible parameters, but I'm fine with the default values in most of the cases.
``` resource "aws_vpc" "main" { cidr_block = "10.0.0.0/20" instance_tenancy = "default" enable_dns_support = true enable_dns_hostnames = true } ```
One parameter that you need to set is `cidr_block` . The value I provided ("10.0.0.0/20") allows for a total of 4096 available IP addresses in the 10.x.x.x range. Our database will be in a public subnet so we'll need to also set the `enable_dns_support` and `enable_dns_hostnames` parameters to true.
#### **Internet gateway** The [internet gateway](https://registry.terraform.io/providers/hashicorp/aws/latest/docs/resources/internet_gateway) allows things in your VPC to communicate with the public internet.
``` resource "aws_internet_gateway" "igw" { vpc_id = aws_vpc.main.id } ```
The only required parameter for the resource is `vpc_id`. #### **Subnet** ``` resource "aws_subnet" "public" { for_each = var.public_subnet_numbers vpc_id = aws_vpc.main.id availability_zone = each.key cidr_block = cidrsubnet(aws_vpc.main.cidr_block, 4, each.value) } ```
As explained above the for_each argument will cause Terraform to create multiple instances of a resource. The `public_subnet_numbers` variable is a map keyed by availability zone. Like the VPC, a [subnet](https://registry.terraform.io/providers/hashicorp/aws/latest/docs/resources/subnet) also takes a cidr_block argument. The built-in `cidrsubnet` function allows you to further subdivide the VPC's CIDR block into smaller blocks, in this case blocks of size 255. #### **Route table** The [route table](https://registry.terraform.io/providers/hashicorp/aws/latest/docs/resources/route_table) contains route mappings which determines how traffic is directed within the subnets.
``` resource "aws_route_table" "public" { vpc_id = aws_vpc.main.id } # Public Route resource "aws_route" "public" { route_table_id = aws_route_table.public.id destination_cidr_block = "0.0.0.0/0" gateway_id = aws_internet_gateway.igw.id } # Public Route to Public Route Table for Public Subnets resource "aws_route_table_association" "public" { for_each = aws_subnet.public subnet_id = aws_subnet.public[each.key].id route_table_id = aws_route_table.public.id } ```
The route being created will direct all traffic (0.0.0.0/0) to our internet gateway. Following that we associate the route with each of our subnets. ### Database Amazon offers managed instances for all of the most popular relational databases. I chose MariaDB, but you could also use PostgreSQL or MySQL since Drupal works with those as well.
The code for this portion can be found [here](https://github.com/Tcraw77813/drupal-fargate/tree/main/modules/rds) #### **Security Group** Since everything in this project resides in a public subnet it has a public IP associated with it, meaning anyone can access it if they know the address. In order to prevent unwanted people from accessing our database were creating a security group. [Security groups](https://registry.terraform.io/providers/hashicorp/aws/latest/docs/resources/security_group) (sg) behave like a firewall for your VPC, restricting network access to and from a device based on IP address, protocol, or port number. ``` resource "aws_security_group" "rds_sg" { name = "rds-sg" description = "Security group for RDS" vpc_id = var.vpc.id ingress { description = "Allow MySQL traffic" from_port = "3306" to_port = "3306" protocol = "tcp" security_groups = [var.ecs_sg] } egress { from_port = 0 to_port = 0 protocol = "-1" cidr_blocks = ["0.0.0.0/0"] ipv6_cidr_blocks = ["::/0"] } } ```
The `security_groups` argument in the ingress rule limits inbound traffic to only traffic from the ECS service. #### **RDS** After creating the security group, I'm next creating two random strings, which will be used for the database admin account's username and password. The [random_string]() resource generates strings with special characters that Amazon doesn't allow so we override its list of special characters with the `override_special` argument.
``` resource "random_string" "rds_username" { length = 14 special = false } resource "random_string" "rds_password" { length = 20 override_special = "!#$%&*()-_=+[]{}<>:?" } ```
The final piece of this module is the [RDS instance](https://registry.terraform.io/providers/hashicorp/aws/latest/docs/data-sources/db_instance) itself. There are dozens of arguments with this module, but only five of them are required (allocated_storage, engine, instance_class, password, & username). Since this was a proof of concept project I chose the smallest instance class (2 vCPU and 1GB RAM) under the free tier.
``` resource "aws_db_instance" "rds" { identifier = "drupal-fargate" instance_class = "db.t3.micro" db_name = "drupal" engine = "mariadb" engine_version = "10.6" username = random_string.rds_username.result password = random_string.rds_password.result port = 3306 multi_az = false network_type = "IPV4" publicly_accessible = true auto_minor_version_upgrade = true db_subnet_group_name = aws_db_subnet_group.drupal_rds_group.name vpc_security_group_ids = [aws_security_group.rds_sg.id] storage_type = "gp3" allocated_storage = 20 skip_final_snapshot = true } ``` **Note:** The last parameter `skip_final_snapshot` needs to be set to true, otherwise Terraform will get stuck in a loop during the destroy phase.
### Storage Elastic file storage (EFS) is a service that allows you to create a file system which can be attached and shared by multiple devices, it's basically network attached storage. We'll be using this to store user uploaded files as well as system generated files (aggregated css/js, image styles, etc). Since these files need to be accessible to all instances of our app this is the perfect solution. The code for this portion can be found [here](https://github.com/Tcraw77813/drupal-fargate/tree/main/modules/efs) #### **Security Group** Similar to the RDS security group, this restricts network traffic to only the NFS port coming from the ECS service. I've only included the ingress rule since that's the only meaningful difference. ``` ingress { description = "Allow NFS traffic" from_port = "2049" to_port = "2049" protocol = "tcp" security_groups = [var.ecs_sg] } ```
#### **EFS** The [EFS](https://registry.terraform.io/providers/hashicorp/aws/latest/docs/resources/efs_file_system) resource definition doesn't have any required parameters, but I've provided one that encrypts the data. ``` resource "aws_efs_file_system" "files" { encrypted = true lifecycle_policy { transition_to_ia = "AFTER_30_DAYS" } } ```
#### **Mount target** We create [mount targets](https://registry.terraform.io/providers/hashicorp/aws/latest/docs/resources/efs_mount_target) so that the file system can be accessed on each of the subnets and is locked down via a security group definition. ``` resource "aws_efs_mount_target" "name" { for_each = var.subnets file_system_id = aws_efs_file_system.files.id security_groups = [aws_security_group.efs_sg.id] subnet_id = each.key } ```
#### **Access point** The final piece of the module is the "access point". By default all files in the EFS are accessible to anyone who mounts the file system. ``` resource "aws_efs_access_point" "files" { file_system_id = aws_efs_file_system.files.id posix_user { uid = 82 gid = 82 } root_directory { creation_info { owner_uid = 82 owner_gid = 82 permissions = 755 } path = "/files" } } ```
[Access points](https://registry.terraform.io/providers/hashicorp/aws/latest/docs/resources/efs_access_point) allow you to create specific entry points (chroot) on your EFS, essentially locking down access to only the directory that you specify. I'm using an alpine linux based image which has the www-data user's id as 82, so that's the uid and gid that I'm using for the posix_user and owner values of the access point. ### Load balancer The load balancer, as the name suggests, distributes traffic between various instances of the your application. If you have auto-scaling configured new instances will be created and destroyed depending on your configuration and each of those instances will have an IP address associated with it. The load balancer will keep track of those IPs as new ones are created and old ones are deleted. The code for this module can be found [here](https://github.com/Tcraw77813/drupal-fargate/tree/main/modules/alb) #### **Security group** The load balancer should accept requests to port 80 (and 443 if you have TLS configured) from any IP and that's what the security group stipulates. #### **ALB** We want the [load balancer](https://registry.terraform.io/providers/hashicorp/aws/latest/docs/resources/lb) (lb) to be public facing so we set the `internal` argument to false. Amazon provides several different types of load balancers, but we want an application load balancer (ALB) so that's what we give as the `load_balancer_type` argument. ``` resource "aws_lb" "alb" { name = "drupal-fargate-lb" internal = false load_balancer_type = "application" security_groups = [aws_security_group.lb_sg.id] subnets = [for subnet in keys(var.subnets) : subnet] } ```
#### **Target group** The [target group](https://registry.terraform.io/providers/hashicorp/aws/latest/docs/resources/lb_target_group) is a collection of resources that should receive traffic from the load balancer. There are several ways that the lb can determine which instances belong to this group. In our case we want IP based filtering and for that we must provide the VPC so it knows the IP range to look for. Our nginx container is listening on port 80 to that's the value of the `port` argument of the module. ``` resource "aws_lb_target_group" "df_tg" { name = "df-lb-tg" port = 80 protocol = "HTTP" target_type = "ip" vpc_id = var.vpc_id health_check { enabled = true path = "/health" interval = 60 matcher = "200" } } ```
Health checks are required so that the lb knows which targets are in a state where they can receive requests. I have a route set up in my nginx configuration that lives on the `/health` route, so we use that value.
#### **Listener** The final part of this module is the [listener](https://registry.terraform.io/providers/hashicorp/aws/latest/docs/resources/lb_listener). This tells the load balancer to listen on a certain port and then perform an action when traffic is received. We want requests from the lb's port 80 to be forwarded to our ECS service's port 80 so we configure the "default action" to do that. ``` resource "aws_lb_listener" "http_listener" { load_balancer_arn = aws_lb.alb.arn port = 80 protocol = "HTTP" default_action { type = "forward" target_group_arn = aws_lb_target_group.df_tg.arn } } ```
### Application Amazon's elastic container service (ECS) is a fully managed container orchestration system. It allows you to quickly and easily deploy, maintain, and scale containerized applications. In our use case we're hosting a Drupal site so we'll have two containers (nginx & php). ECS allows you to upload those images to a repository and then run them on Amazon managed (Fargate) or self managed EC2 instances. The code for this module can be found [here](https://github.com/Tcraw77813/drupal-fargate/tree/main/modules/ecs) #### **Security Group** We only want our site to be accessible via the load balancer so we lock down the group to only accept traffic on port 80 and only from the load balancer. ``` ingress { from_port = 80 to_port = 80 protocol = "tcp" security_groups = [var.lb_sg] } ``` #### **Container Registry** The container registry is a place where you can upload images that you've built with tools like Docker. A registry is composed of public and private repositories. I already have an ECR repository, so I'm using a data block to look it up. ``` data "aws_ecr_repository" "ecr_repo" { name = "drupal-fargate" } ```
#### **ECS Cluster** The [cluster](https://registry.terraform.io/providers/hashicorp/aws/latest/docs/resources/ecs_cluster) contains the service that we're going to create. A cluster can have any number of services. ``` resource "aws_ecs_cluster" "cluster" { name = "DrupalCluster" } ```
The only required argument for a cluster is `name` #### **ECS Service** The [service](https://registry.terraform.io/providers/hashicorp/aws/latest/docs/resources/ecs_service) is in charge of creating and maintaining the appropriate number of instances that you've configured. ``` resource "aws_ecs_service" "service" { name = "drupal-fargate-service" cluster = aws_ecs_cluster.cluster.id task_definition = aws_ecs_task_definition.drupal.arn desired_count = 1 launch_type = "FARGATE" load_balancer { target_group_arn = var.lb_tg_arn container_name = "nginx" container_port = 80 } network_configuration { subnets = var.vpc_subnets security_groups = [aws_security_group.ecs_sg.id] assign_public_ip = true } wait_for_steady_state = true enable_execute_command = false } ```
To simplify the setup I chose to use fargate instances as the `launch_type`. The `desired_count` is set to 1 so the load balancer is technically unnecessary, but I wanted to incorporate one for my own learning. The `network_configuration` simply tells the system which subnets it can create instanced inside of and to give it a public IP address. If you need to remote shell into your containers set the `enable_execute_command` value to true. You can find further instructions for debugging [here](https://www.ernestchiang.com/en/posts/2021/using-amazon-ecs-exec). **Note:** The first time you run this you might want to comment out the `wait_for_steady_state` line in case your app doesn't get into that state. If it doesn't work it might lead to a prolonged timeout during the apply phase.
#### **ECS Task Definition** The [task definition](https://registry.terraform.io/providers/hashicorp/aws/latest/docs/resources/ecs_task_definition) give your service the information on what your hardware requirements (cpu and memory) are as well as which containers need to be included. You can divide up the resources per container as well as expose ports and mount volumes. For the sake of brevity I won't include the code, but you can view it [here](https://github.com/Tcraw77813/drupal-fargate/blob/main/modules/ecs/main.tf#L73). ## Applying the code #### Init Assuming that you haven't already, you'll need to start by running `terraform init` to download the providers. 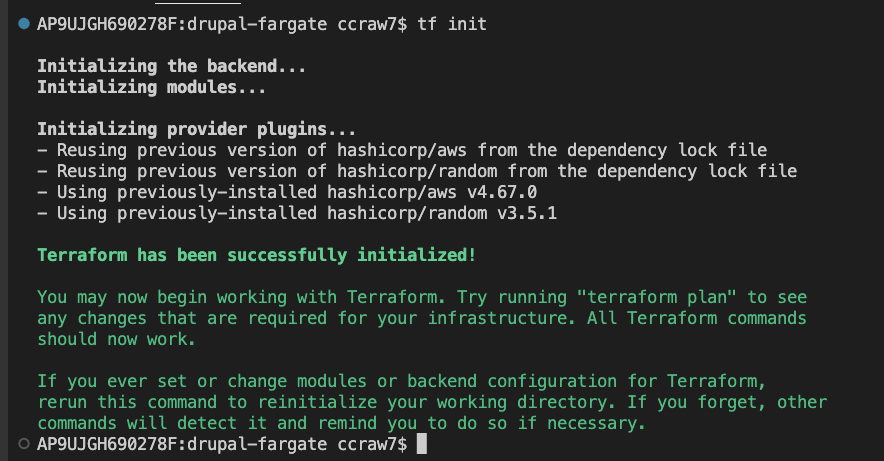 #### Plan & apply If you try and run the plan command, you'll receive an error saying that Terraform wasn't able to determine the keys for the `subnets` variable at this time.  In order for the `for_each` argument to work, Terraform has to know ahead of time the size and keys of the map that it's iterating over. That means you have to either hardcode the values or do a multistep process. Since the IDs of the subnets will be randomly generated each time we can't know them, so hardcoding is not an option. That leaves us with only one option, build the VPC infrastructure out first and then build the rest in a second stage. In order to do that you'll have to run: `terraform plan -target module.vpc -out vpcplan` The `target` allows you to select only a subset of the modules listed in the root module. If you want to include multiple modules you have to provide multiple target arguments (ex: -target module.vpc -target module.vpc) The `out` options tells Terraform to output the plan to a file. That file can then be used during the apply step. To actually create the VPC just run `terraform apply vpcplan --auto-approve` Assuming the apply steps was successful, you should see your new VPC and its associated parts like in the image below. 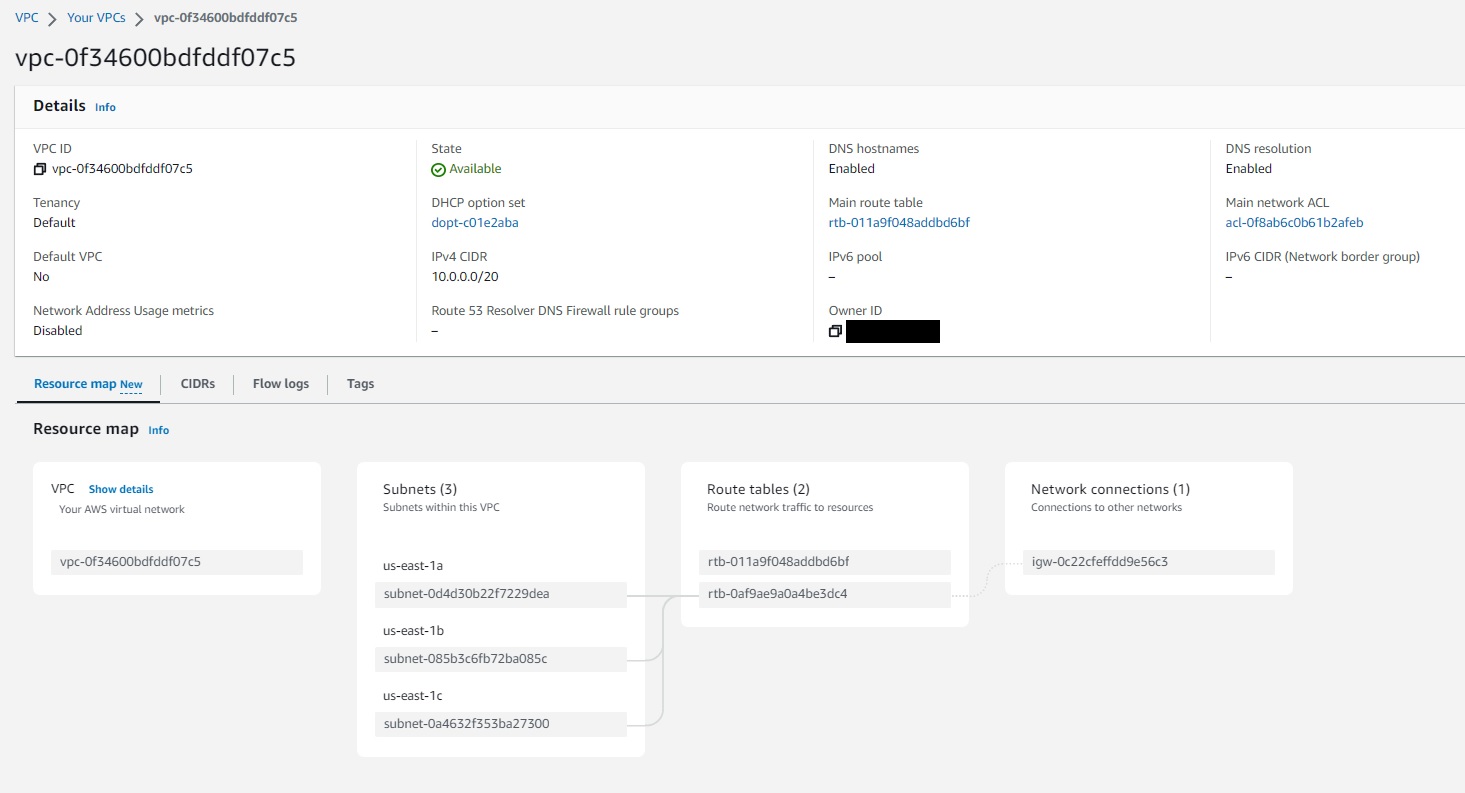 Your state should now include all the necessary information for Terraform the build out the rest of your infrastructure. To confirm this, run the plan command: `terraform plan` , followed by `terraform apply --auto-approve`. The apply phase took on average 4 minutes to get everything into a working state. Once the apply has completed you can return to the AWS console and nagivate to the load balancer page to get the DNS hostname. 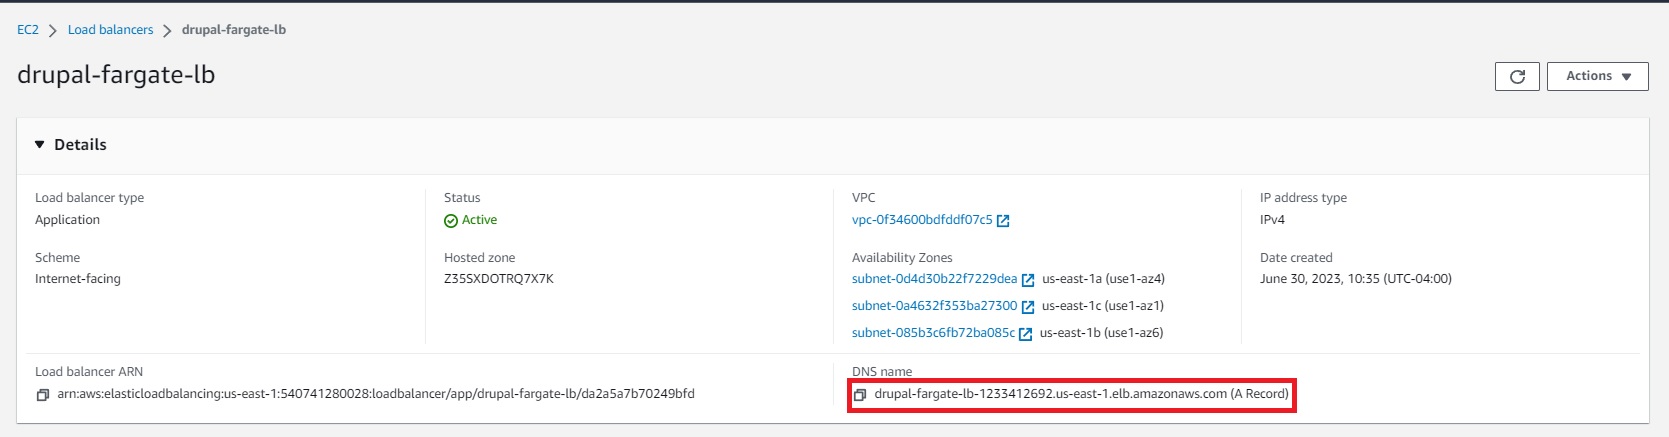 Paste that into your browser and you should be greeted with the Drupal installation wizard. The database credentials are stored in your `terraform.tfstate` file. The hostname of the RDS instance can also be found in the state file or you can find it in the AWS console. Once you've completed the installation wizard you should now have a fully functioning Drupal site.
 #### Destroy When you're done with the site all you need to do is run `terraform destroy`. This will delete each of the resources that have been built. ## Resources 1. [Terraform Registry - AWS Provider](https://registry.terraform.io/providers/hashicorp/aws/latest/docs) 2. [Youtube - AWS ECS Tutorial | Deploying an app from scratch](https://www.youtube.com/watch?v=esISkPlnxL0) 3. [Terraform - Modules overview](https://developer.hashicorp.com/terraform/tutorials/modules/module) 4. [Amazon - What is a VPC](https://docs.aws.amazon.com/vpc/latest/userguide/what-is-amazon-vpc.html)